Setting Up a Home GitLab Server on Raspberry Pi
Fun fact, not a lot of people know about me: I built my first computer when I was 13 and obsessed with having bleeding edge graphics. I remember lurking on newegg for components, fretting over Radeon or Nvidia, Intel or AMD, and whether 16GB of RAM would be enough. Once I had my components saved to a list, I found a YouTube video detailing how to assemble them and spent the summer earnings I'd made working for the family business to have everything shipped to my house. With my mom's help, we assembled the giant lego on the kitchen table over a couple of days. The experience taught me a lot about the inner workings of the computer and in retrospect probably put me on the path to doing something in the computer/software industry.
My first job in the software industry was as a GitLab admin for my undergraduate research group at the University of Arizona. It was the second semester of my senior year of college, and honestly, I felt overwhelmed the first time I opened GitLab. Containers, packages, pipelines, wikis - I didn't even know how to spell "git"! I loosely understood that it was an organization solution for code, but I didn't get much further than adding members to projects over the three-month research group gig. Nine years and hundreds of GitLab projects later, I deeply appreciate GitLab, GitHub, and Bitbucket as foundational tools for teams developing software.
The first time I heard of the Raspberry Pi was in my senior undergraduate design class. At first, I thought Raspberry Pi and Arduino were reserved for embedded applications. It didn't strike me until much later that I could use one as a private GitLab server. I had used GitHub when co-developing pymetalog, but that platform had always struck me as more of a portfolio exhibit platform vs a full-lifecycle DevOps platform. After Microsoft acquired GitHub and OpenAI began crawling it to train ChatGPT, I decided I did not want my code made available as training fodder for an LLM. Thus began my journey to stand up a private GitLab server on a Raspberry Pi!
Before you begin, make sure you have
- monitor
- micro-HDMI to HDMI/DisplayPort
- keyboard connectable via USB
- mouse connectable via USB
- SSD connectable via USB
Once you unbox the Pi, the first order of business is to install an image that is compatible with GitLab Community Edition (CE). I'm embarrassed to admit that this took several attempts! On the first attempt, I used an image that was incompatible with GitLab CE. On the second attempt, I got the image correct but downloaded the 32-bit version (GitLab CE requires a 64-bit OS). On the third and fourth attempts, I forgot my root password and couldn't log in 😔. Finally, I got it right with the following image / GitLab CE version:
- OS: Debian GNU/Linux 12 (bookworm) 64 bit
- GitLab: 18.5.2 Bookworm
Setting up SSH to access the Pi from another host on the same network can be a royal pain. For instance, when I unplugged the Pi from power over the weekend while I had house sitters, my router assigned it a new IP address. My old SSH configuration couldn't find the host IP address, so I had to play whack-a-mole, connecting to different devices on my network. After the micro-HDMI-to-HDMI cable arrived, all I had to do was plug the Pi into my display to get its IP address.
Raspberry Pi 4 8GB, Raspberry Pi 5 8GB, and Raspberry Pi 5 16GB are your best bets for a Pi beefy enough to run GitLab CE, Docker, and the runner software. I went with the Raspberry Pi 4 8GB and learned the hard way that 8GB RAM is barely large enough. You will inevitably need to modify the swap settings on the Pi so GitLab can run. This repo was a lifesaver in helping get it configured. Claude is a lifesaver for troubleshooting the inevitable issues that come up!
vim > nano. One of the most valuable commands I picked up along this journey is
vim +/searchterm filename
Trust me: when you have to change one line in the 4000-line-long ‘/etc/gitlab/gitlab.rb‘ config, jumping straight to the config key without having to scroll and squint is clutch.
GitLab is a very read/write intensive application, especially when you have runners configured. As someone who has blown out hard drives on their MacBook Pro before, I can appreciate the need to match the proper hardware to the right job. In the case of GitLab, you absolutely want an external SSD instead of the onboard SD card. If you're like me, and you figured this out along the way, rip-clone tool is the easiest way I found to clone the OS and all installed apps off the SD card onto the SSD.
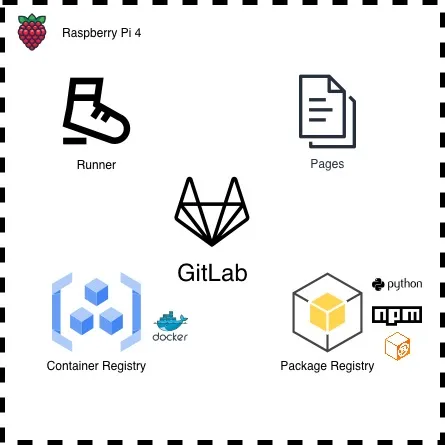
Setting up GitLab Core is only the first step. To have a “fully” functional GitLab instance, I had to also configure and install
- Docker
- GitLab container registry
- GitLab runner
- GitLab package registry
- GitLab pages
For now, I have my runner and Docker installed on the same host as GitLab. I’m already eyeing an expansion, as I had to set ‘concurrency=2’ (which throttles GitLab to run at max two jobs at a time) to prevent my GitLab instance from blowing up. This is less than ideal for large production pipelines. I have two tagged runners: shell and docker.
shellis used to invoke Docker build processes on the runner for building, tagging, and pushing images to the container registrydockeris used to pull the tagged images from the container registry, clone the given pipeline branch, and invoke jobs against the branch
The shell tagged jobs take forever to build, tag, and push Docker images to the container registry; I'm already eyeing an expansion to have a dedicated Raspberry Pi 5 runner with 16GB RAM that is separate from the instance running GitLab:
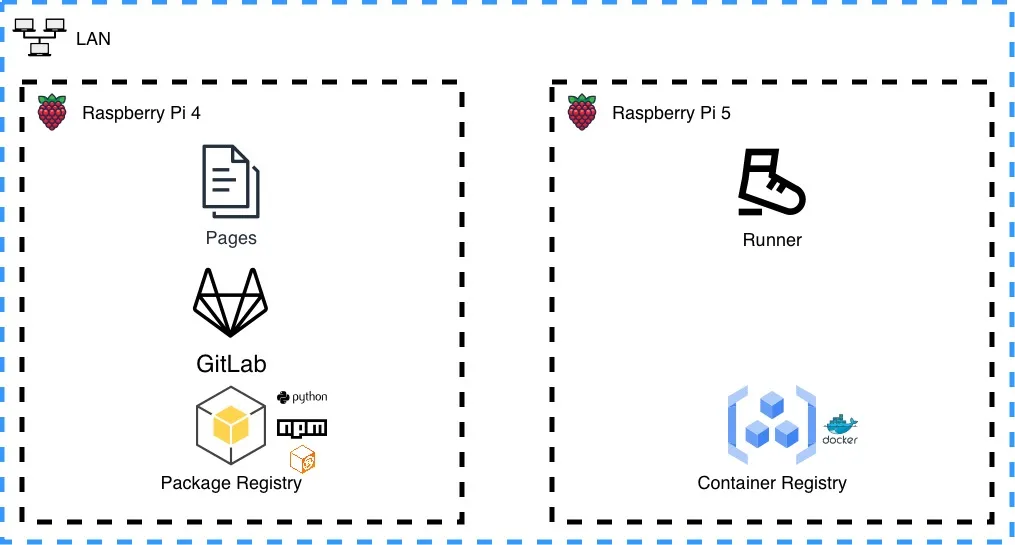
This multi-Pi setup is about as far as you can take it before a dedicated home server or custom build is needed. It still will struggle with complex CI/CD pipelines where compilation is required (like Rust crates).
The neat thing about using Raspberry Pi is that each Pi uses minimal electricity, and horizontally scaling the system is relatively easy. All I have to do is add another Pi and register a new runner with GitLab!
This exercise made me appreciate all that the IT department at my company does, which I had taken for granted. It's a royal pain fighting with networking, security, and configuration. I can see why cloud providers have ballooned in popularity over the past decade - it's soo much easier to push a button and launch the infrastructure than to manage your own. However, "cloud" is someone else's computer, and I like to own all parts of the stack, including the hardware.
Stay tuned for the next post where I detail how I set up my production pipeline!